Launching your first online store can feel like a daunting task. From choosing the right platform to managing inventory and processing payments, the process can be overwhelming. This comprehensive guide will demystify the process of setting up your first online store using the power of WooCommerce on WordPress. We’ll cover everything from initial setup and product management to marketing strategies and security best practices, empowering you to create a thriving e-commerce business. Whether you’re selling physical products, digital downloads, or services, this guide will provide you with the knowledge and resources you need to build a successful online store.
WooCommerce, the leading e-commerce plugin for WordPress, provides a flexible and robust platform to build your online presence. This guide will walk you step-by-step through the process of installing and configuring WooCommerce, adding products, setting up payment gateways, managing shipping, and optimizing your online store for conversions. By leveraging the combined power of WordPress and WooCommerce, you can create a professional and scalable e-commerce platform tailored to your specific business needs. Get ready to transform your entrepreneurial dreams into a reality with this comprehensive guide to setting up your first online store.
Introduction to WooCommerce and WordPress
WooCommerce is a powerful, open-source e-commerce plugin built specifically for WordPress. It seamlessly integrates with your existing WordPress website, transforming it into a fully functional online store. This combination leverages the user-friendly nature of WordPress with the robust selling capabilities of WooCommerce, making it an ideal platform for both beginners and experienced online retailers.
WordPress, renowned as a content management system (CMS), provides the foundation for your online presence. Its intuitive interface allows for easy management of website content, including pages, blog posts, and multimedia. WooCommerce extends this functionality by adding dedicated features for product management, order processing, shipping, and more.
By choosing WooCommerce and WordPress, you gain access to a vast ecosystem of themes, plugins, and extensions, enabling extensive customization and scalability. This flexibility allows you to tailor your store to specific business needs, from simple single-product shops to complex multi-vendor marketplaces.
Installing and Configuring WooCommerce
After successfully installing WordPress, the next step is to install the WooCommerce plugin. This is easily done through your WordPress dashboard.
Installing the Plugin
Navigate to the “Plugins” menu and select “Add New.” In the search bar, type “WooCommerce.” The official WooCommerce plugin by Automattic should be the first result. Click “Install Now,” and once installed, click “Activate.”
The Setup Wizard
Upon activation, WooCommerce will launch a setup wizard. This wizard streamlines the initial configuration process, guiding you through essential steps.
You’ll be prompted to provide information about your store, such as its address, industry, product types, and preferred payment methods. The wizard also helps you set up shipping options and connect to essential services like Jetpack.
While the wizard provides a convenient starting point, remember that most settings can be adjusted later within the WooCommerce settings panel. This allows for fine-tuning your store’s functionality as your business evolves.
Adding Products and Managing Inventory
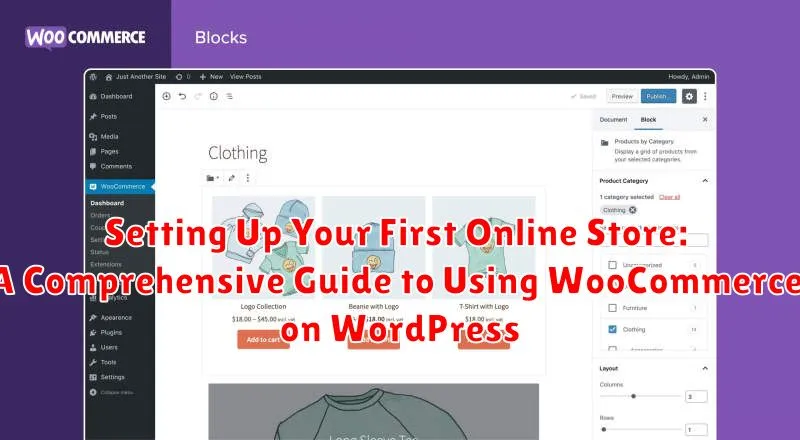
This section focuses on populating your WooCommerce store with products and effectively managing your inventory. Adding products is straightforward. From your WordPress dashboard, navigate to Products > Add New. You’ll be presented with a familiar interface, much like creating a standard WordPress post.
Product Data is the heart of your product listing. Here, you’ll define crucial information, including:
- Product Type: Select the appropriate type, such as Simple product, Variable product (for variations like size or color), or Grouped product.
- General: Set the regular price, sale price (if applicable), and tax status.
- Inventory: Manage stock quantity, enable stock management, and set low stock thresholds.
- Shipping: Define weight, dimensions, and shipping class.
- Linked Products: Upsell or cross-sell related products to maximize sales.
- Attributes: Create attributes like color or size for variations.
- Advanced: Set purchase note, enable reviews, and menu order.
Remember to add a compelling product description and high-quality images to showcase your offerings effectively. Regularly reviewing and updating your inventory levels ensures accurate stock information and a seamless customer experience.
Customizing Your WooCommerce Store’s Appearance
A visually appealing online store is crucial for attracting and retaining customers. WooCommerce offers several ways to customize your store’s appearance to match your brand and create a positive shopping experience.
Choosing a Theme
Themes dictate the overall design and layout of your store. Select a theme specifically designed for WooCommerce for optimal compatibility. Many free and premium themes are available, each with customizable options.
Customizing Your Theme
Most themes provide built-in customization options within the WordPress Customizer. Here, you can adjust colors, fonts, and other visual elements without coding. Some themes also offer more advanced customization through theme options panels.
Using a Page Builder (Optional)
Page builders like Elementor or Beaver Builder provide a drag-and-drop interface to design and customize individual pages, including product pages and shop pages, giving you greater control over the layout and content presentation.
Setting Up Payment Gateways with WooCommerce

A key aspect of any online store is the ability to securely process payments. WooCommerce offers a robust system for integrating various payment gateways, allowing you to accept payments from customers worldwide.
Setting up payment gateways is typically straightforward. Within your WordPress dashboard, navigate to WooCommerce > Settings > Payments. You’ll see a list of available payment methods, both built-in and extensions.
WooCommerce supports popular gateways like PayPal, Stripe, and Square. Choosing the right gateway depends on your business needs and target audience. Consider transaction fees, supported currencies, and security features when making your selection.
After selecting your desired gateway, click “Enable” and follow the on-screen instructions to configure the connection. This usually involves entering API keys or other credentials provided by the payment processor. Testing the connection is crucial before going live to ensure everything functions correctly.
Some gateways offer on-site checkout, processing payments directly within your store, while others redirect customers to an external payment page. Consider the user experience when choosing a gateway, as a seamless checkout process can improve conversion rates.
Managing Shipping and Taxes in WooCommerce
Properly configuring shipping and taxes is crucial for any online store. In WooCommerce, these settings are essential for calculating accurate costs for your customers and ensuring you comply with tax regulations.
Shipping can be configured based on various factors such as weight, dimensions, and destination. You can set up flat rates, real-time rates from carriers, or local pickup options. Clearly defining your shipping zones and methods is vital for a smooth checkout process.
Taxes can be a complex area. WooCommerce offers tools to help manage this complexity. You can configure automatic tax calculations, including sales tax and VAT, based on customer location. It’s also possible to set up different tax classes for different product types, allowing for accurate tax application. Consider consulting with a tax professional to ensure complete compliance.
Extending WooCommerce Functionality with Plugins and Extensions
WooCommerce’s core functionality provides a robust foundation for online stores. However, its true power lies in its extensibility. Plugins and extensions allow you to tailor your store to specific needs and enhance its features.
Plugins add new functionalities, while extensions modify existing ones. They cater to various requirements, from payment gateways and shipping methods to marketing tools and product enhancements. Choosing the right plugins and extensions is crucial for optimizing your store’s performance and customer experience.
The official WooCommerce marketplace offers a curated selection of both free and premium extensions. Thoroughly research each plugin or extension before installation, considering factors like reviews, compatibility, and support. Over-reliance on too many plugins can negatively impact site speed and create conflicts, so prioritize essential additions. Always test new plugins on a staging site before implementing them on your live store.
Essential Tips for WooCommerce Beginners

Starting an online store can feel overwhelming, but focusing on key areas can simplify the process. Here are a few essential tips for WooCommerce beginners:
Choose a Reliable Hosting Provider
Hosting is crucial for your store’s performance and security. Select a provider that offers WooCommerce-optimized hosting for smooth operation and minimal technical issues.
Select a Suitable Theme
A well-designed theme enhances the customer experience. Choose a responsive theme that is specifically designed for WooCommerce to ensure compatibility and a professional look.
Install Essential Plugins
Plugins extend WooCommerce’s functionality. Consider plugins for SEO, security, and performance optimization from the start. Research and select plugins carefully based on your specific needs.
Test Thoroughly
Before launching, test your store extensively. Go through the entire checkout process as a customer to identify any issues with payment gateways, shipping calculations, or other functionalities.
Back Up Regularly
Backups are critical. Regularly back up your website data to prevent data loss in case of technical glitches or other unforeseen circumstances. Implement automatic backups for peace of mind.

